4.3.10.3 Embedding the Ops I window in a site
The [Ops I Block] plugin allows you to embed an Ops I window into your site. Embedding of windows is done by the site network administrator and site administrator.
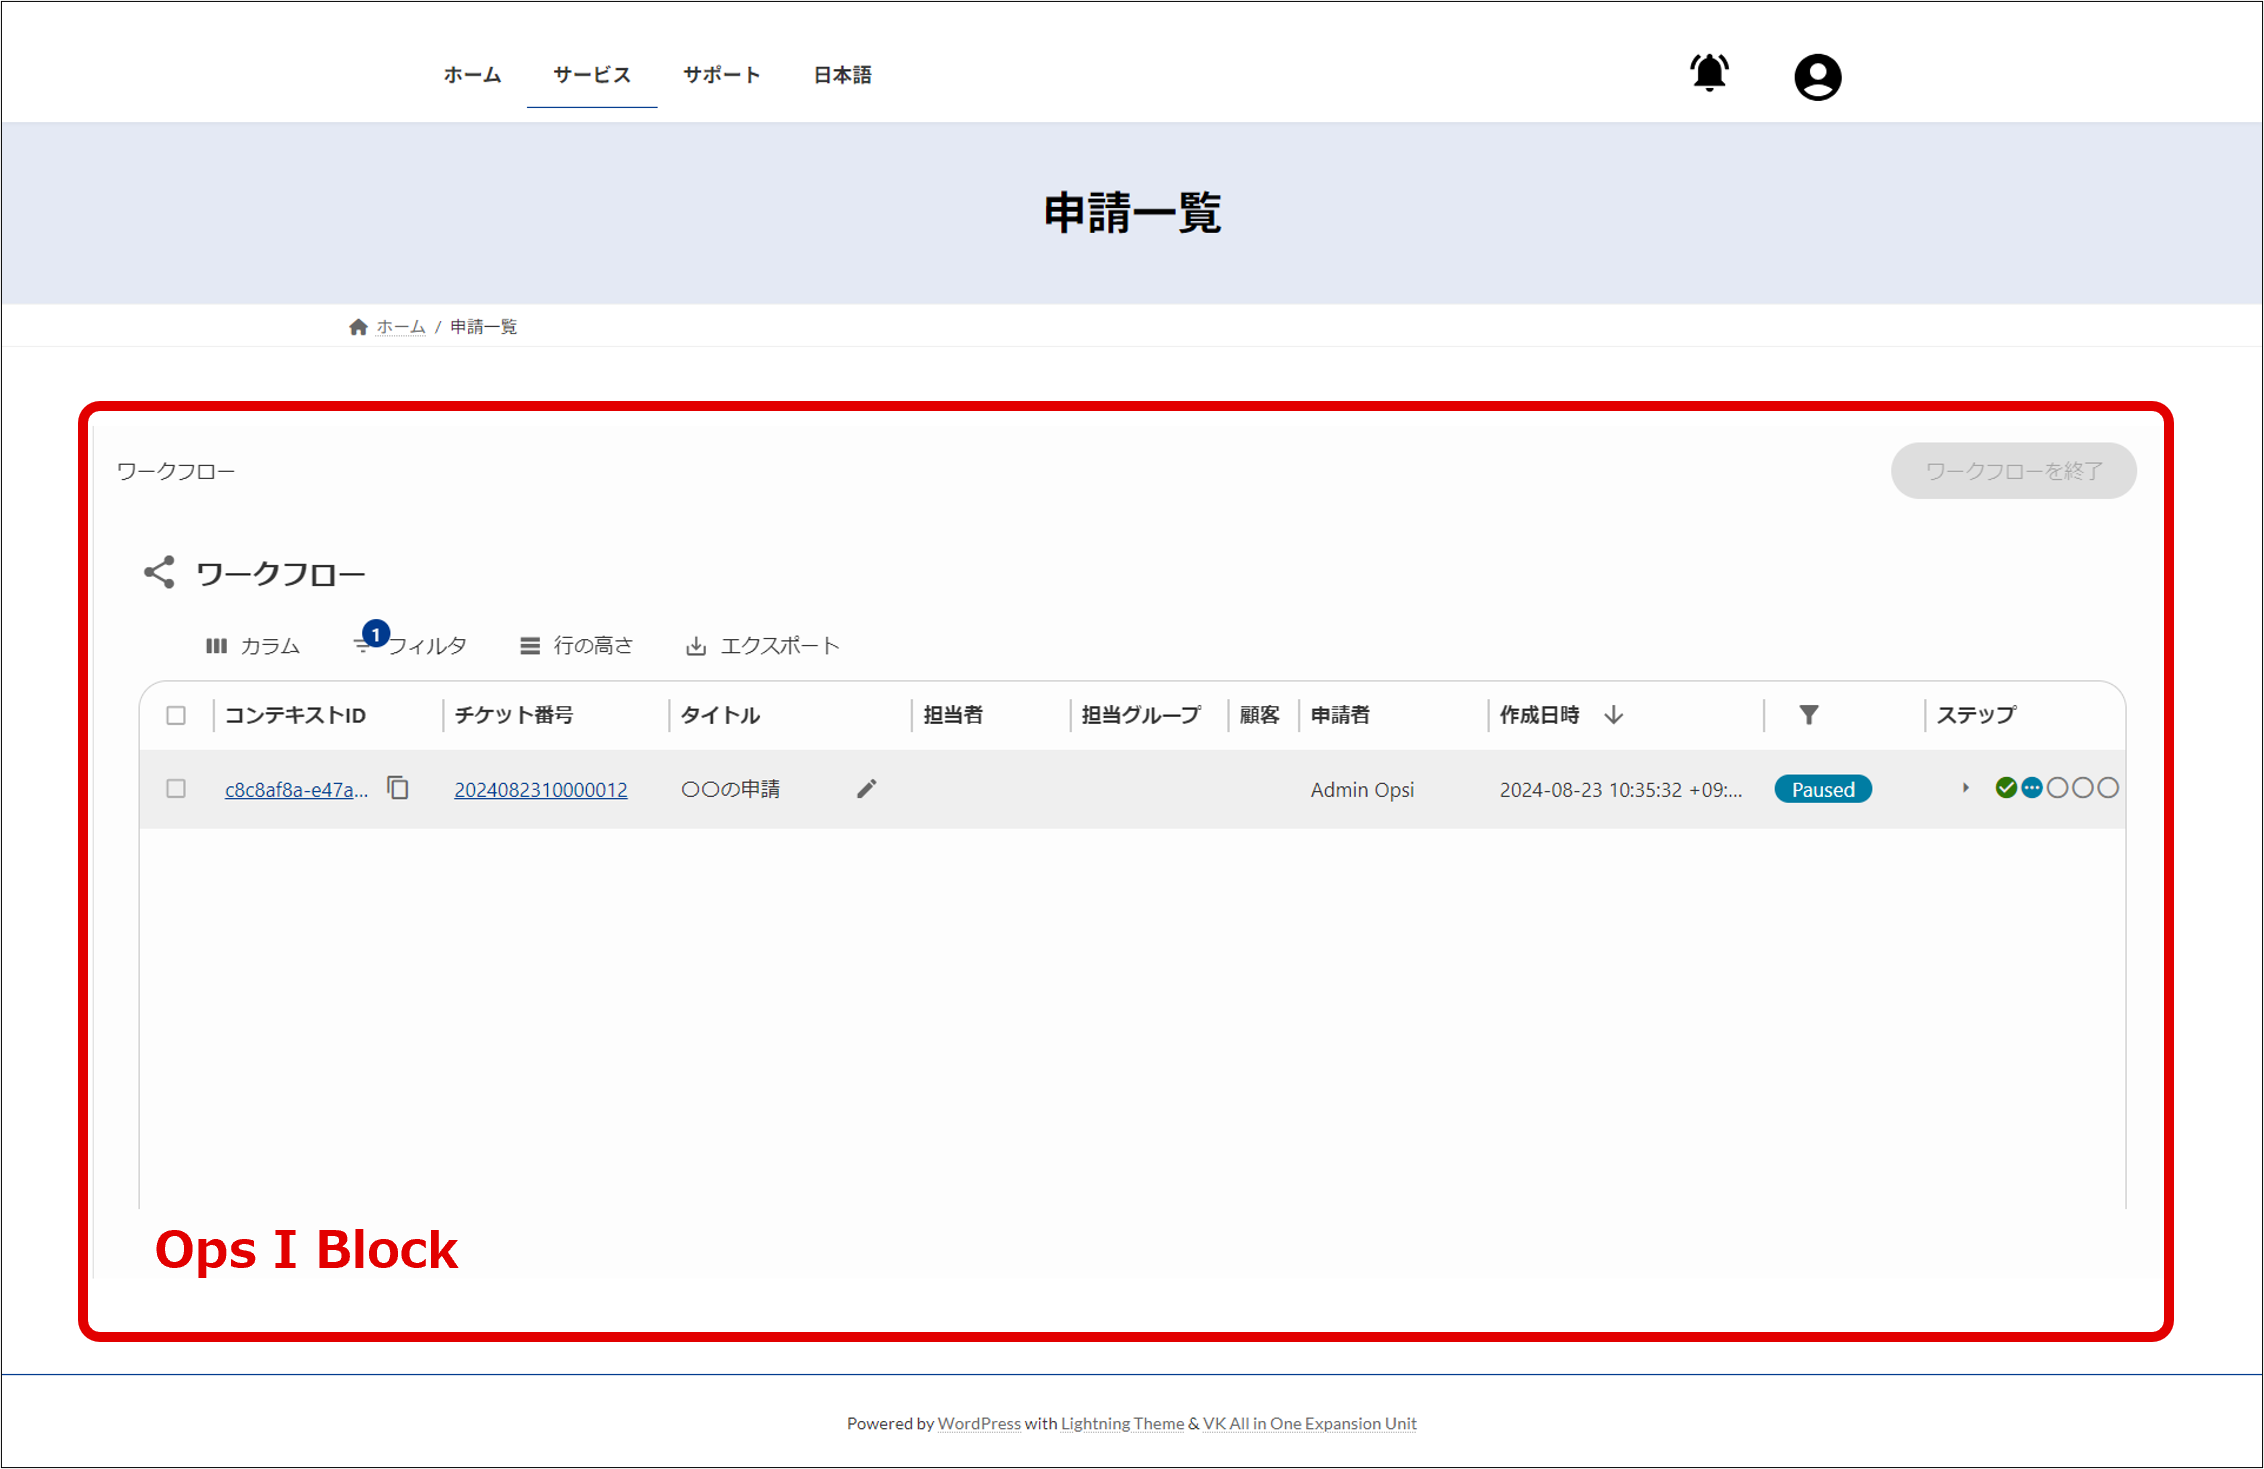
The red framed area in the figure below is the window embedded using [Ops I Block].
[Steps to embed the Ops I window]
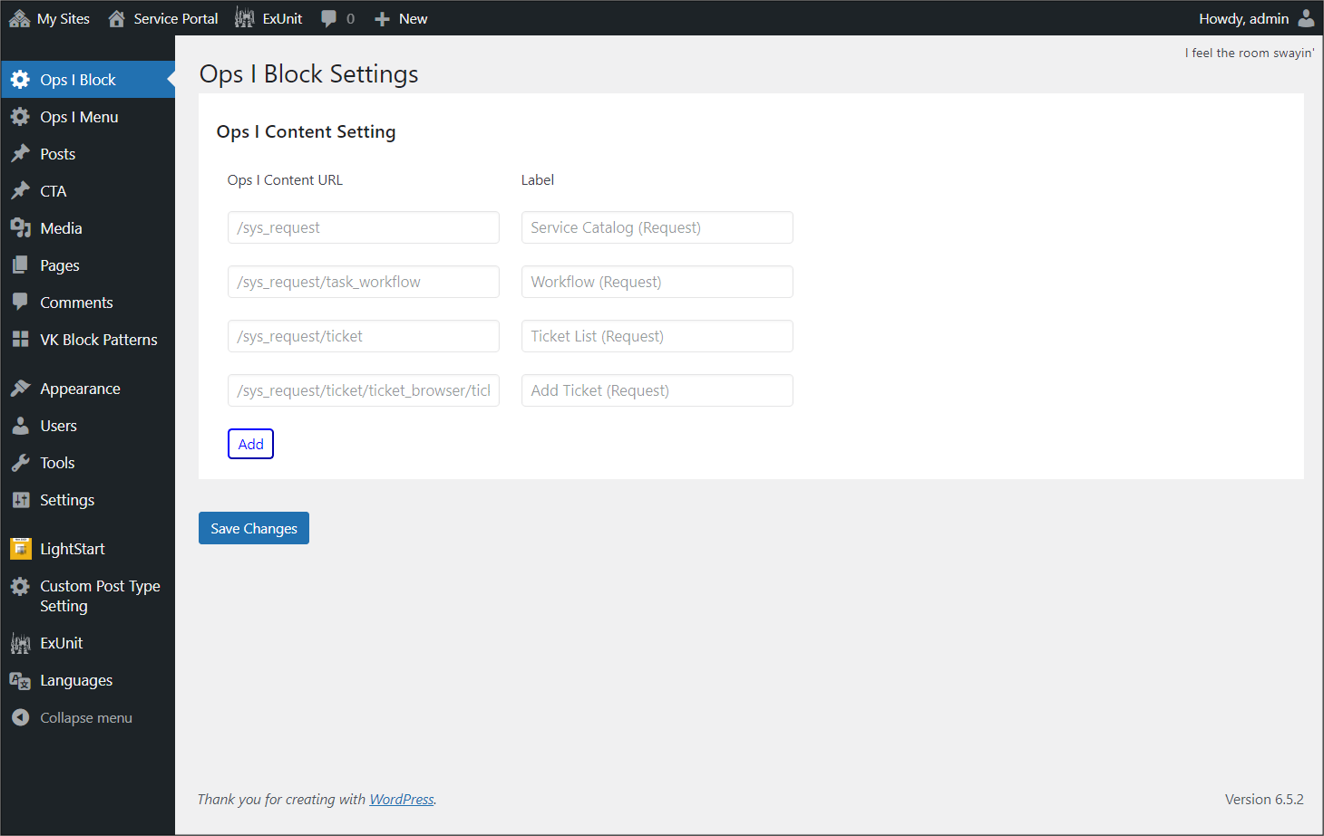
① You can add, update, and delete the URL of the Ops I window used on the site as Ops I content from the [Ops I Content Settings] on the [Site Management] window - [Ops I Block]. When you open [Ops I Block] again, the Ops I content settings you have previously set will be displayed.
The URL of the Ops I content is specified as a path relative to "https://Ops I Domain".
The URL of the Ops I content is specified as a path relative to "https://Ops I Domain".
The following Ops I content is registered by default; you may not edit the content below.
- Service Catalog (Service catalog for request application)
- Workflow (Workflow List window of the request application)
- Ticket List (Ticket browser window of the request application)
- Add Ticket (Add Ticket window of the request application)
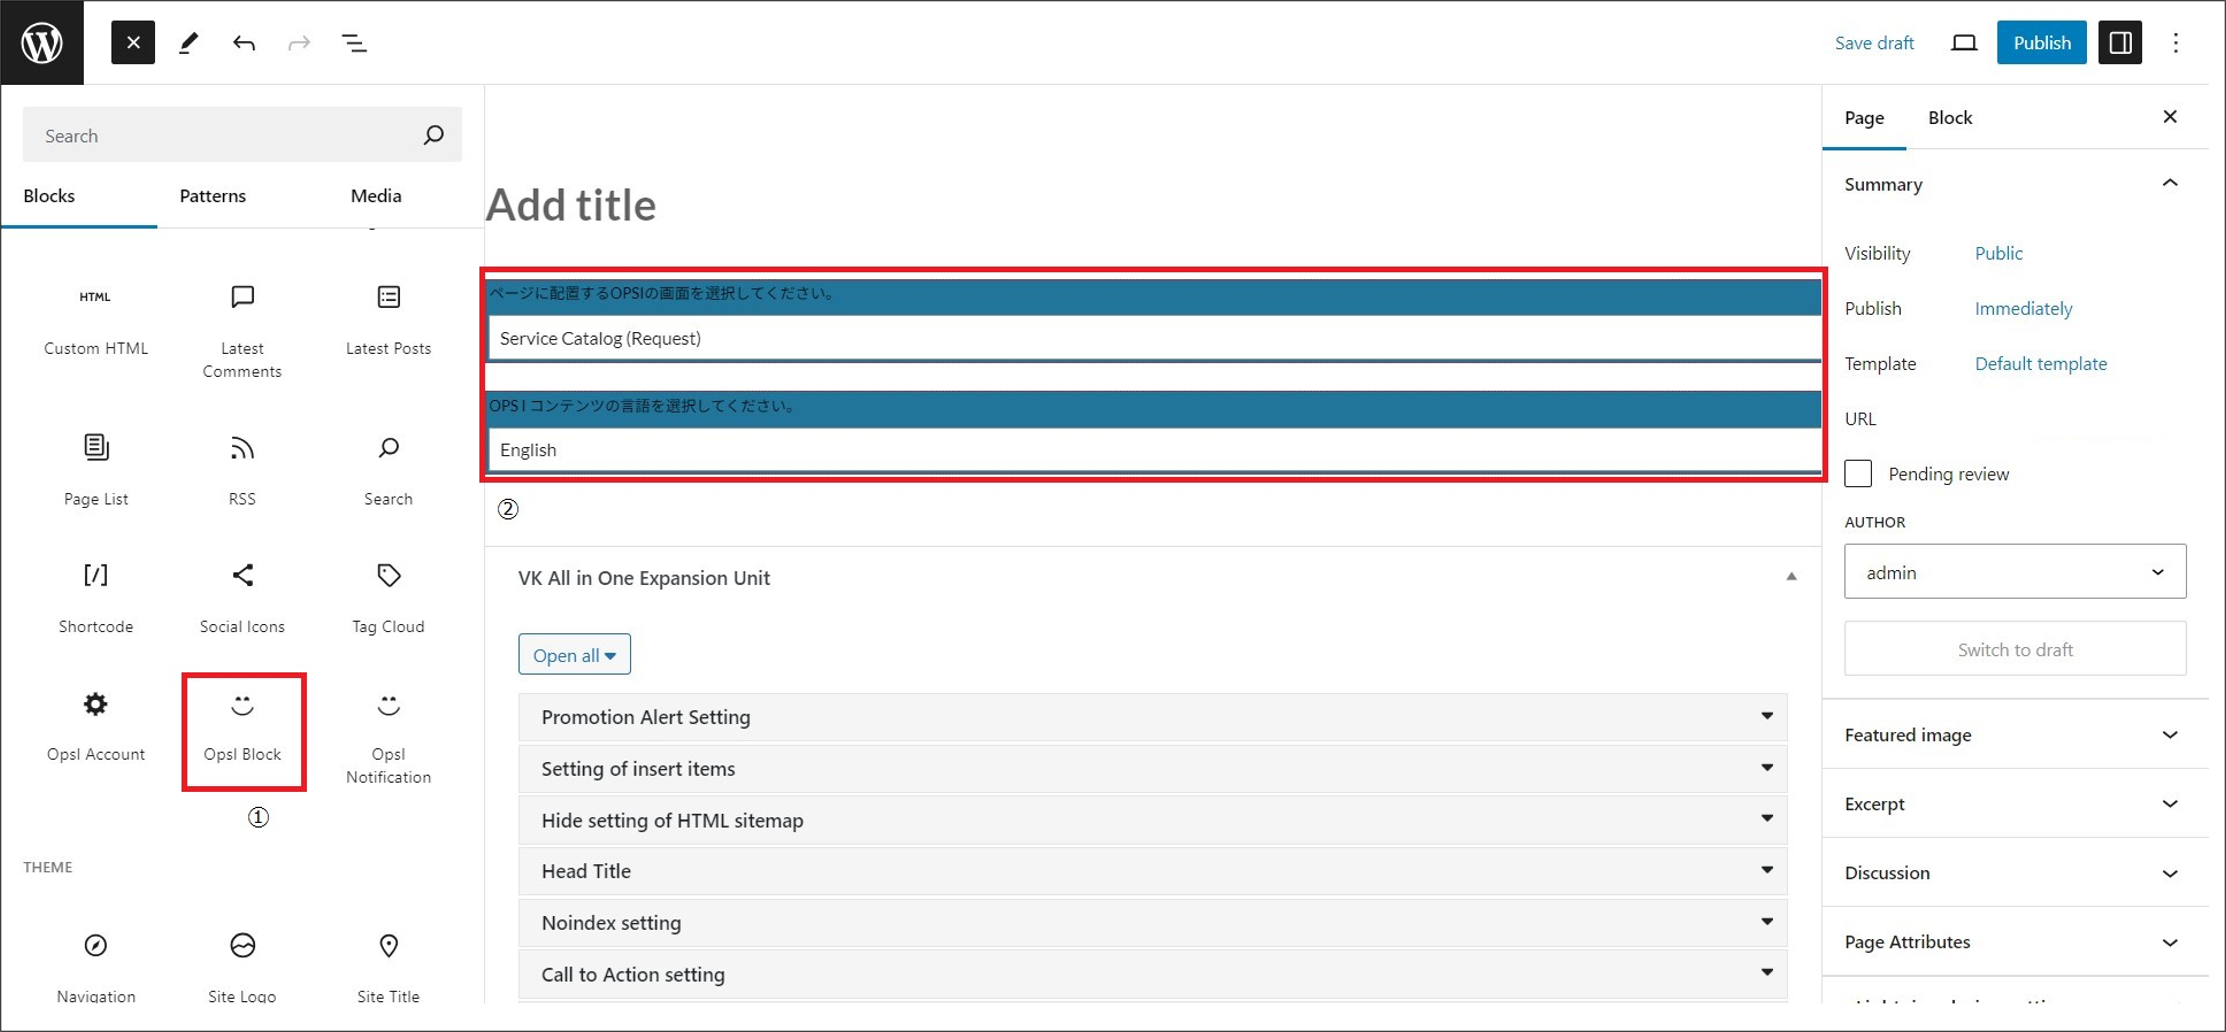
② The site network administrator or site administrator can add an [Ops I Block] on the [Pages] edit page. Select the Ops I content and language to embed.
③ When the user opens the created page, the specified Ops I content is displayed. If clicking on the link in [Ops I Block], it will transition within the site. No transition is made within the Ops I page.
 Notes
Notes
- [Ops I Block] cannot be specified except for Ops I windows.
- There is no limit to the URLs that can be embedded. URLs with query parameters can also be embedded. For example, to embed the Create New Workflow window, specify "/sys_request/task_catalog?workflowId=workflowID".
- Up to one [Ops I Block] may be embedded per page.