4.8 Using a relay server
The following procedure assumes that the relay server is already configured. For more information on relay server settings, see “Setting a relay server”.
When using a relay server, follow Steps ① to ⑥ below.
Perform Steps ① to ③ in System Management and Steps ④ to ⑥ in the automation application (AWX). Step ⑦ describes what to specify in the workflow YAML file.
Users who perform Steps ① to ③ must be granted the Primitive role “automation_manager”. Users who perform Steps ④ to ⑥ must be granted the role that the AWX organization has. For details on AWX roles, refer to the AWX manuals listed in “OSS version/edition and reference manuals” in APPENDIX. For overview of organizations, creating organizations, and assigning each role, see “Configuring organization” and “Organization management”. For general information on assigning roles, see “Roles” and “Correspondence between roles and support functions in Ops I”.
[System Management]
① Add a node group.
For details on adding a node group, see "Node group management".
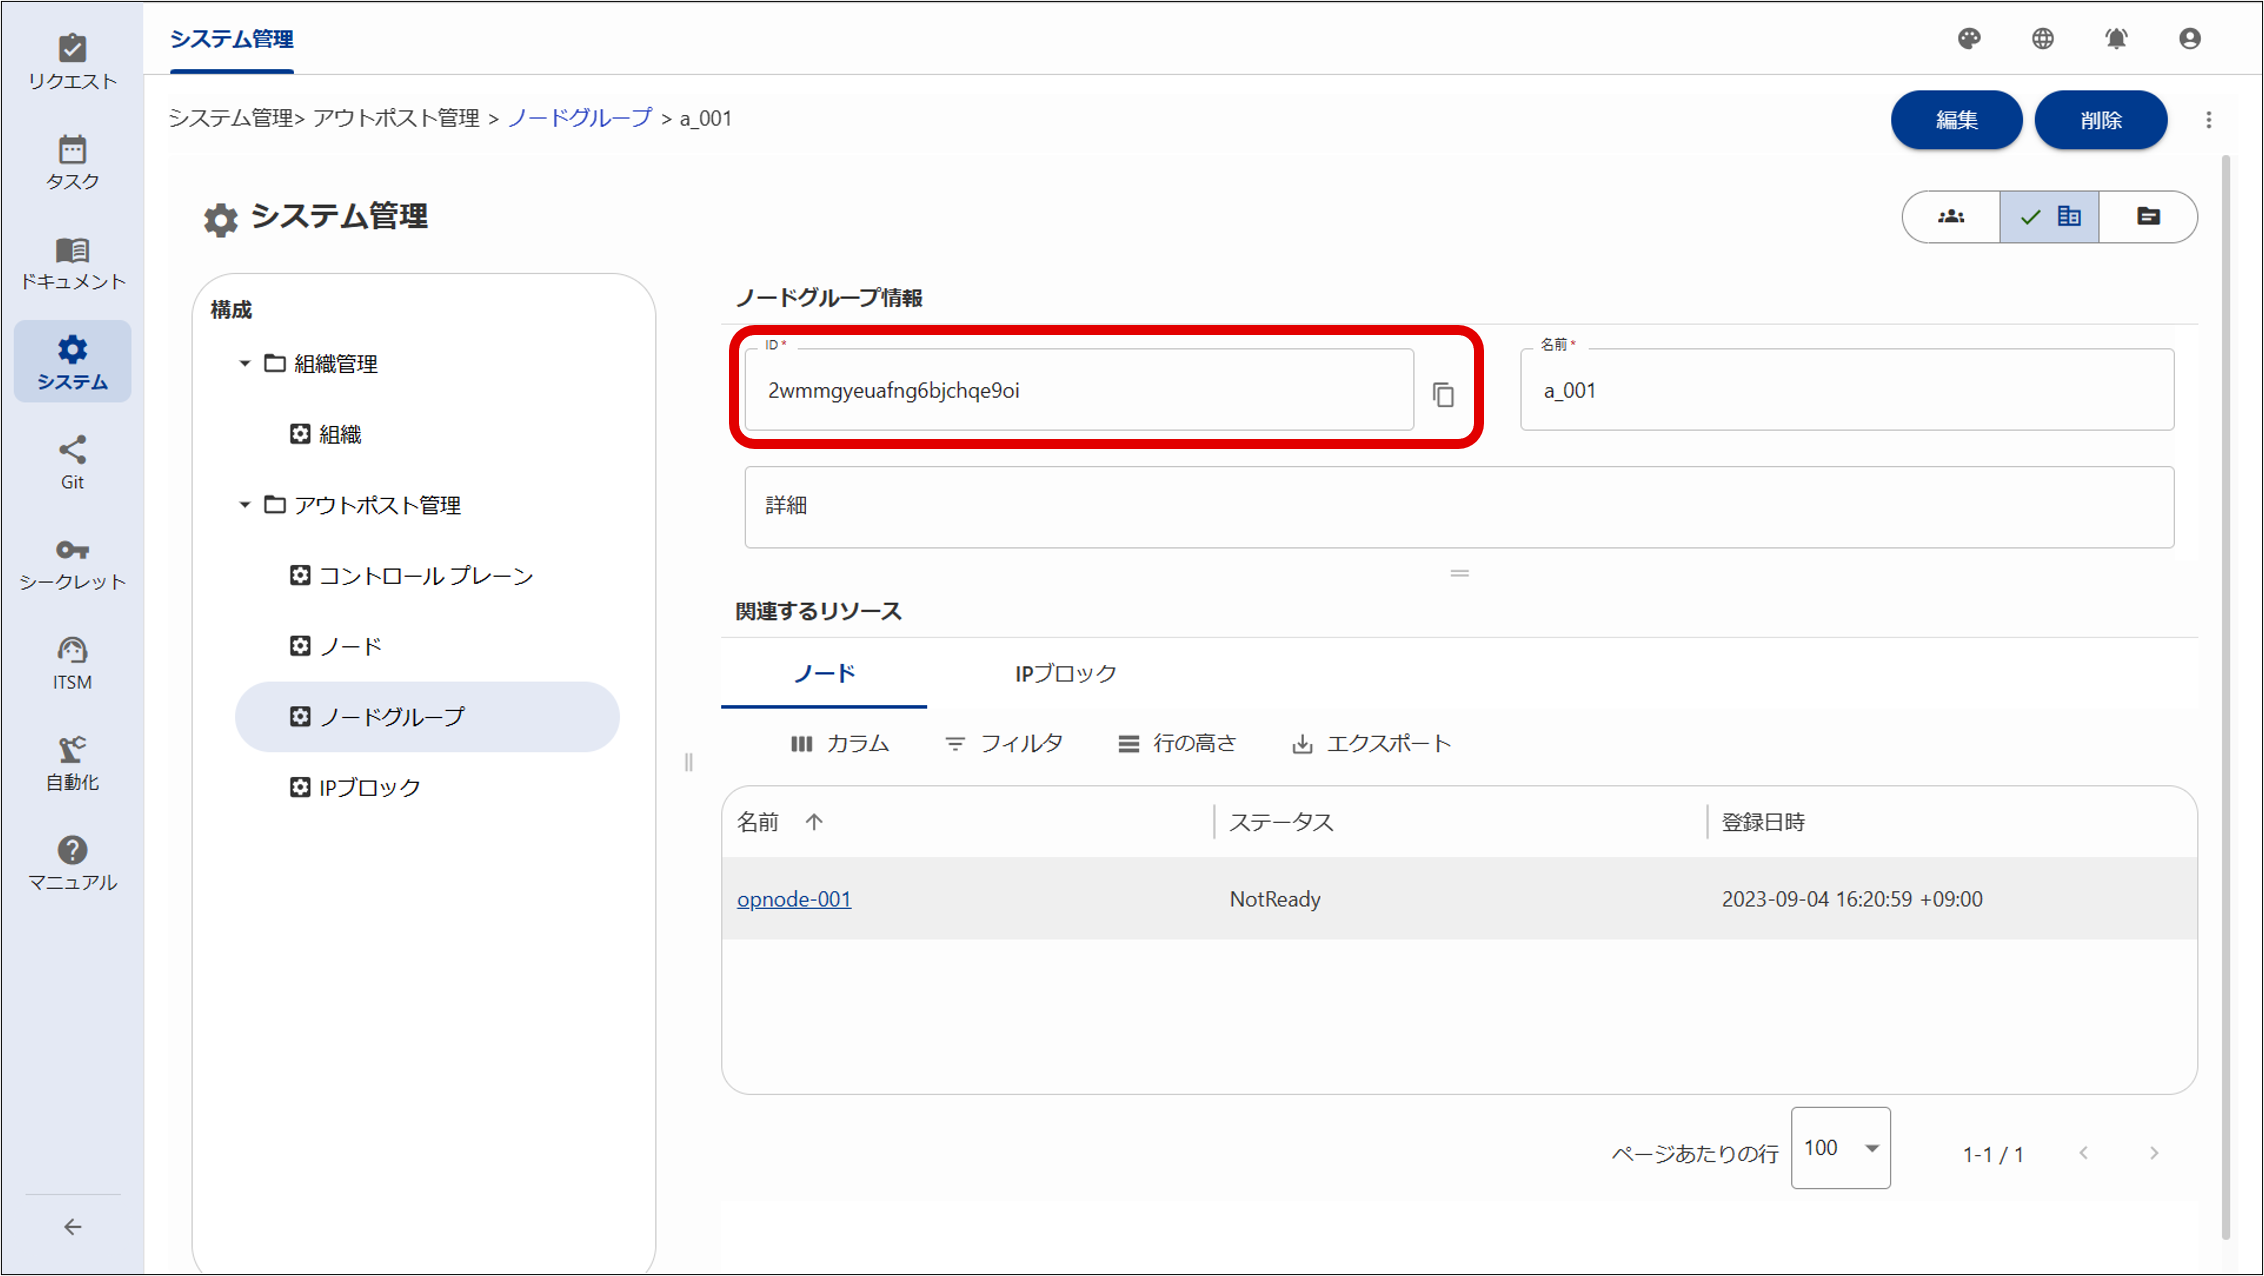
② Add an IP block.
③ Associate nodes and IP blocks with the node group.
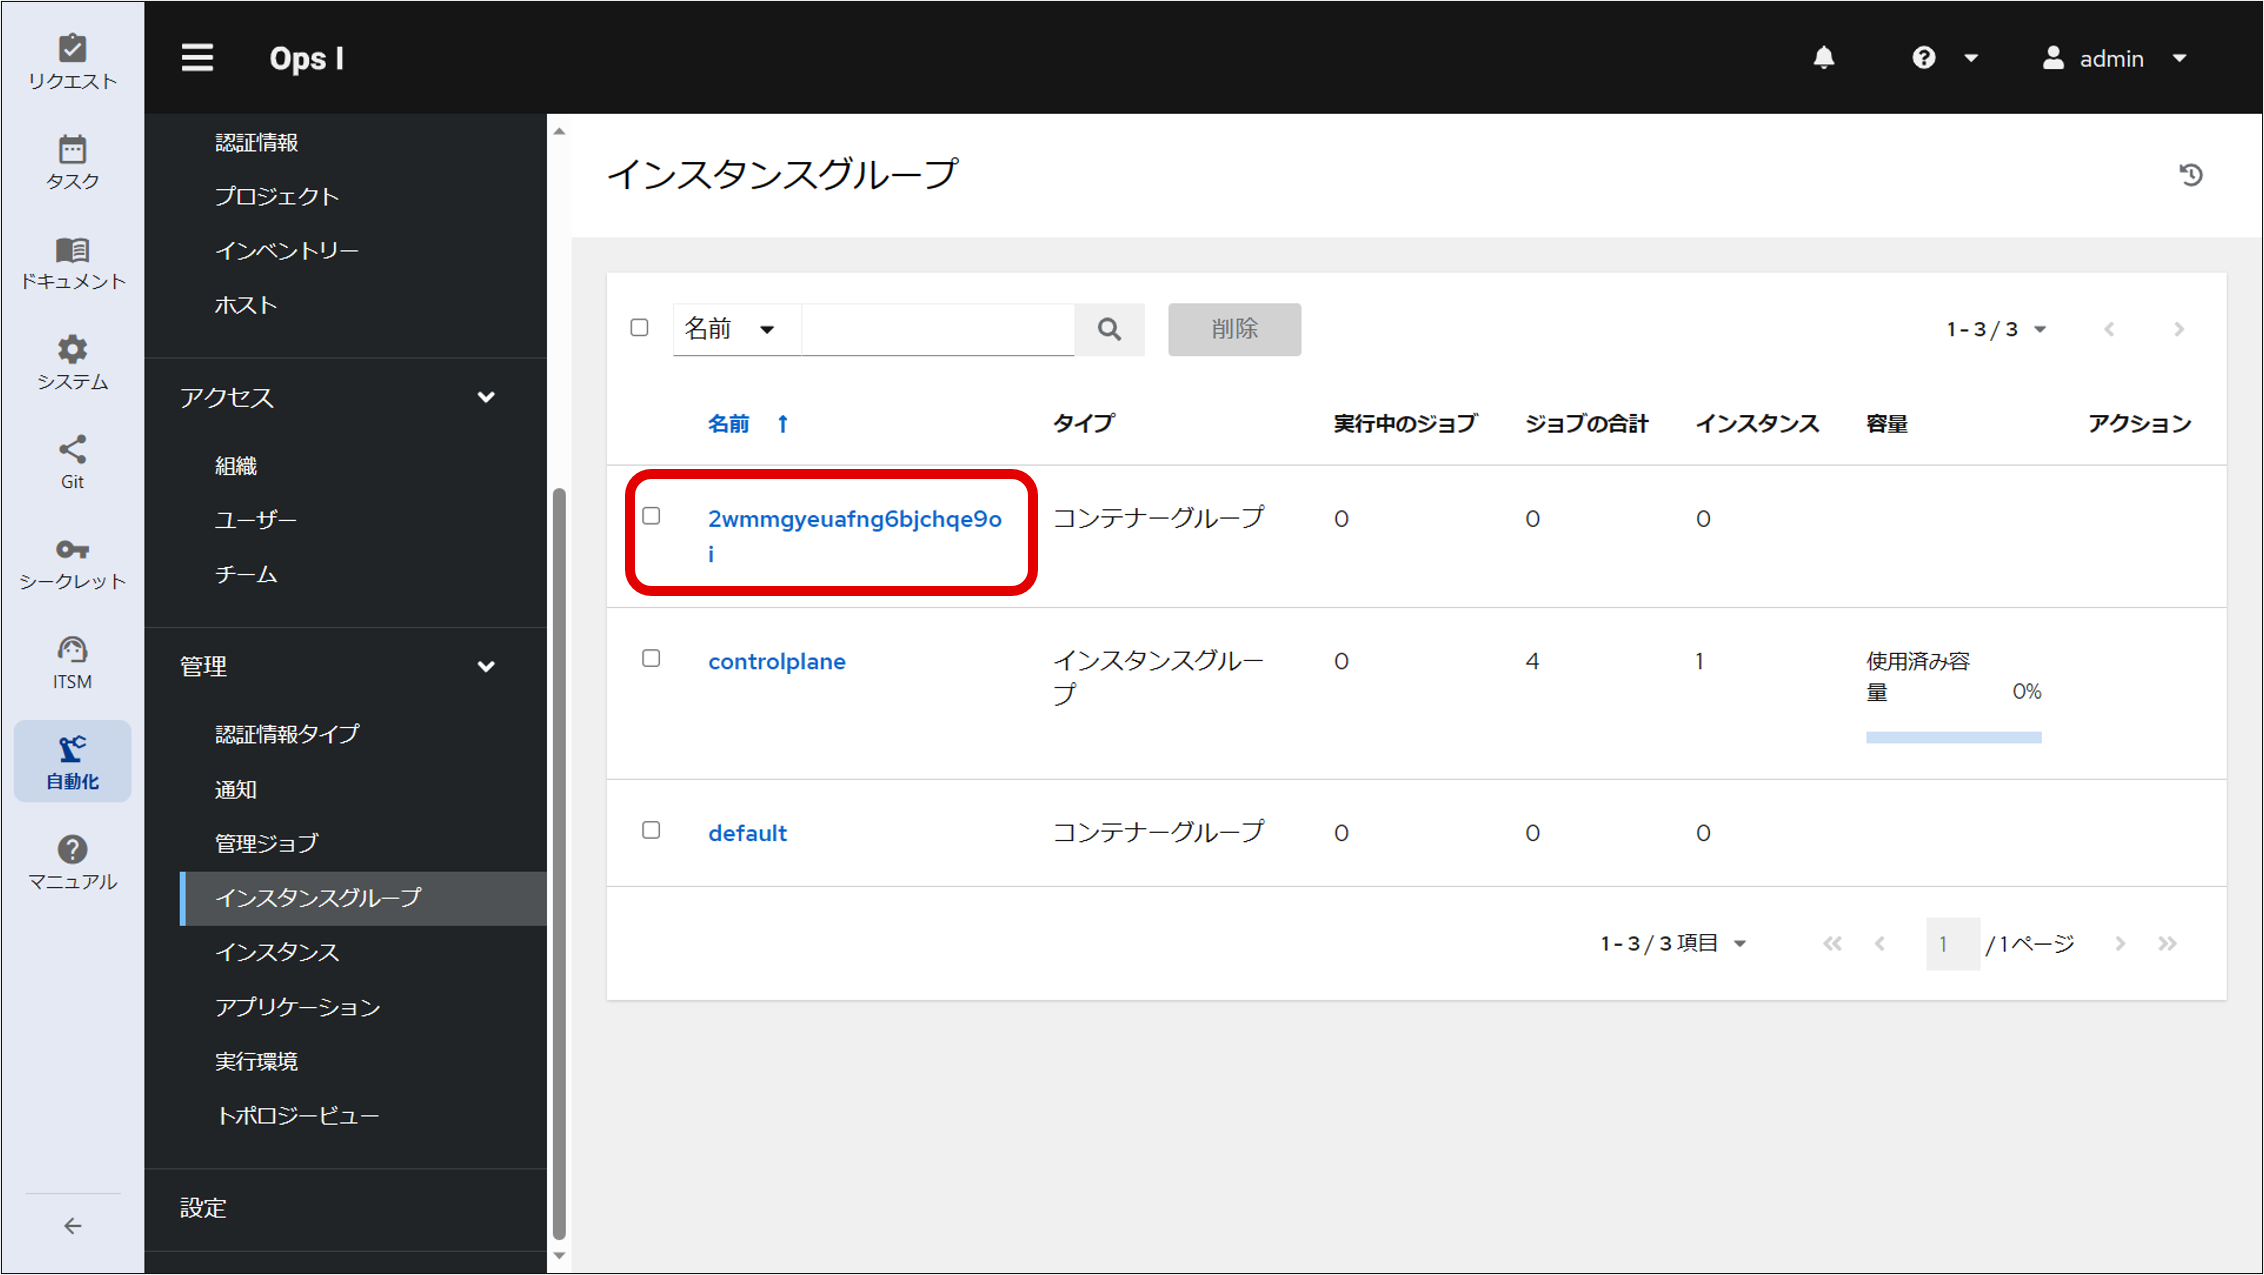
[Automation application (AWX)]
Steps ④ to ⑥ describe the AWX settings required to use a relay server. For information on standard AWX settings, see “Automation”.
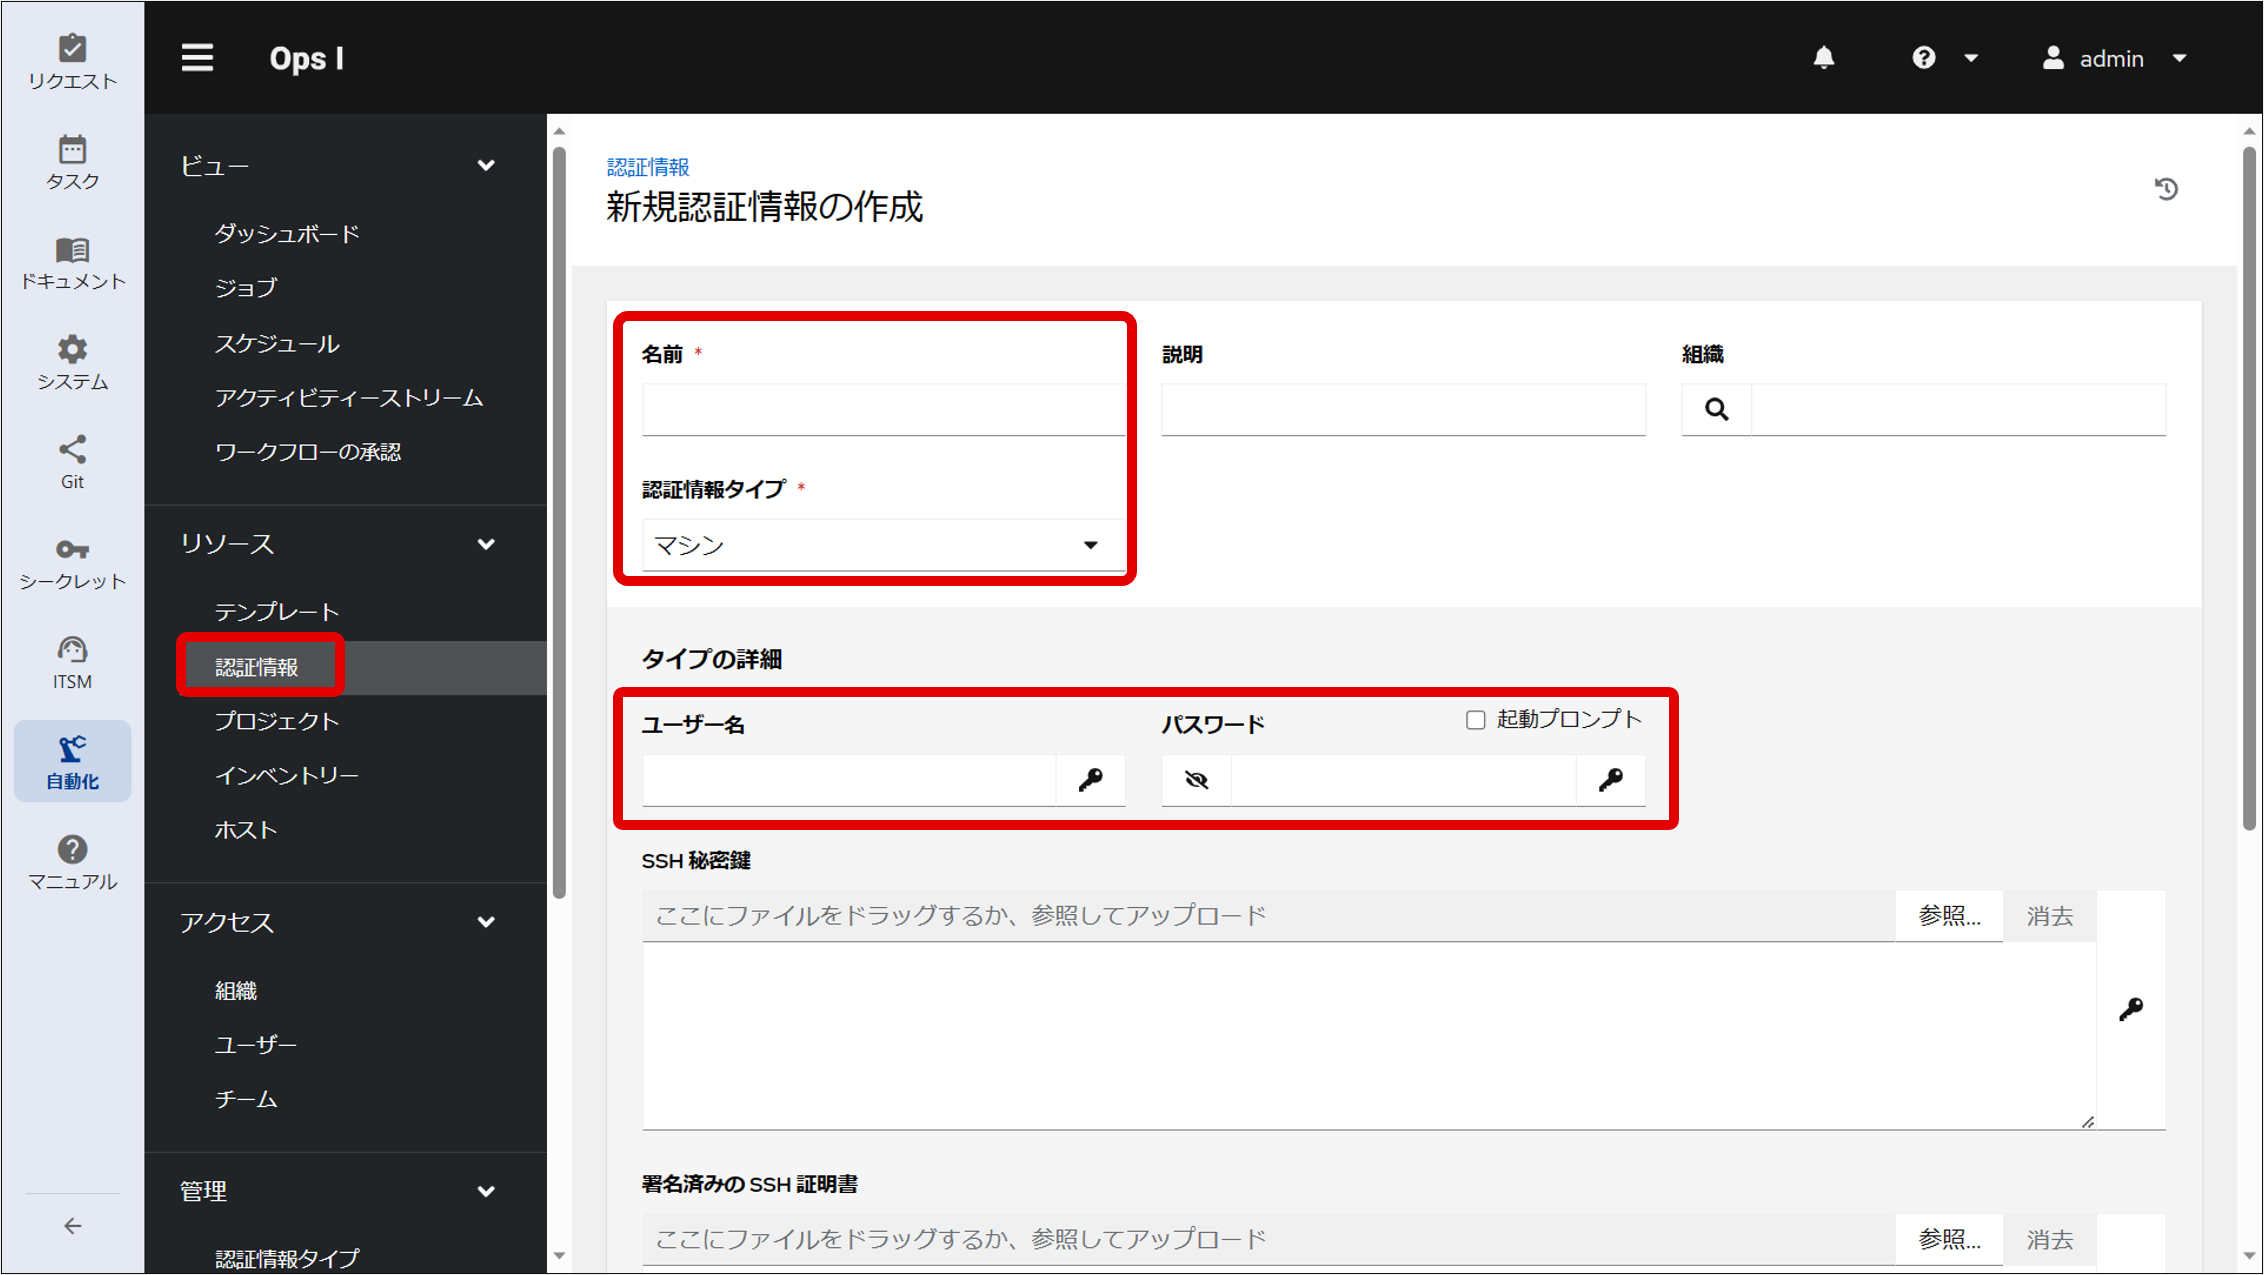
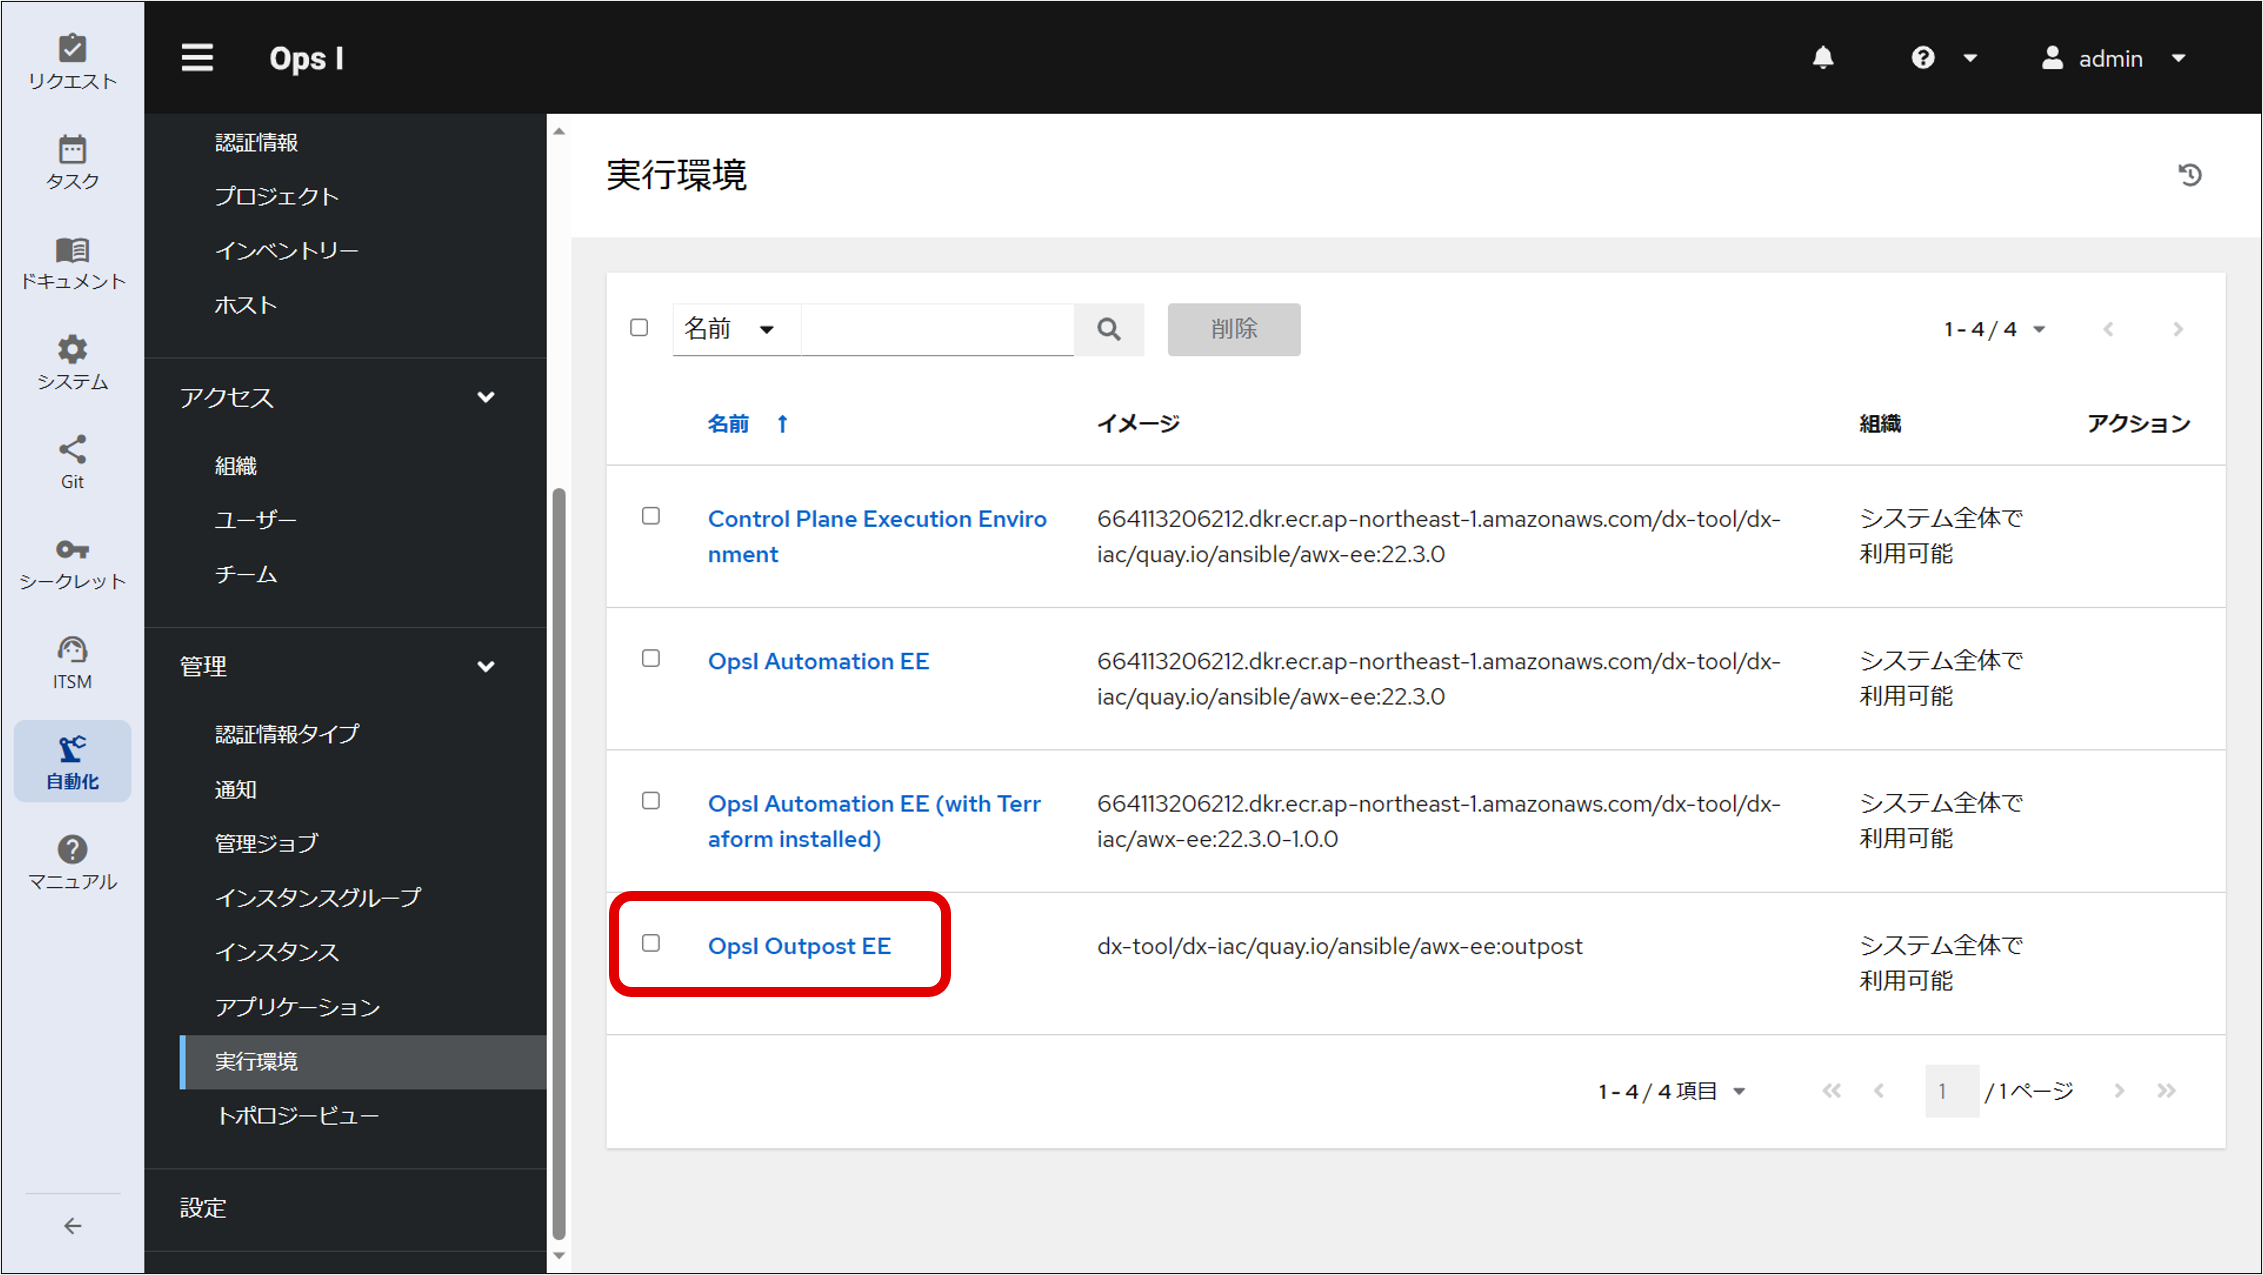
⑤ Create a job template.
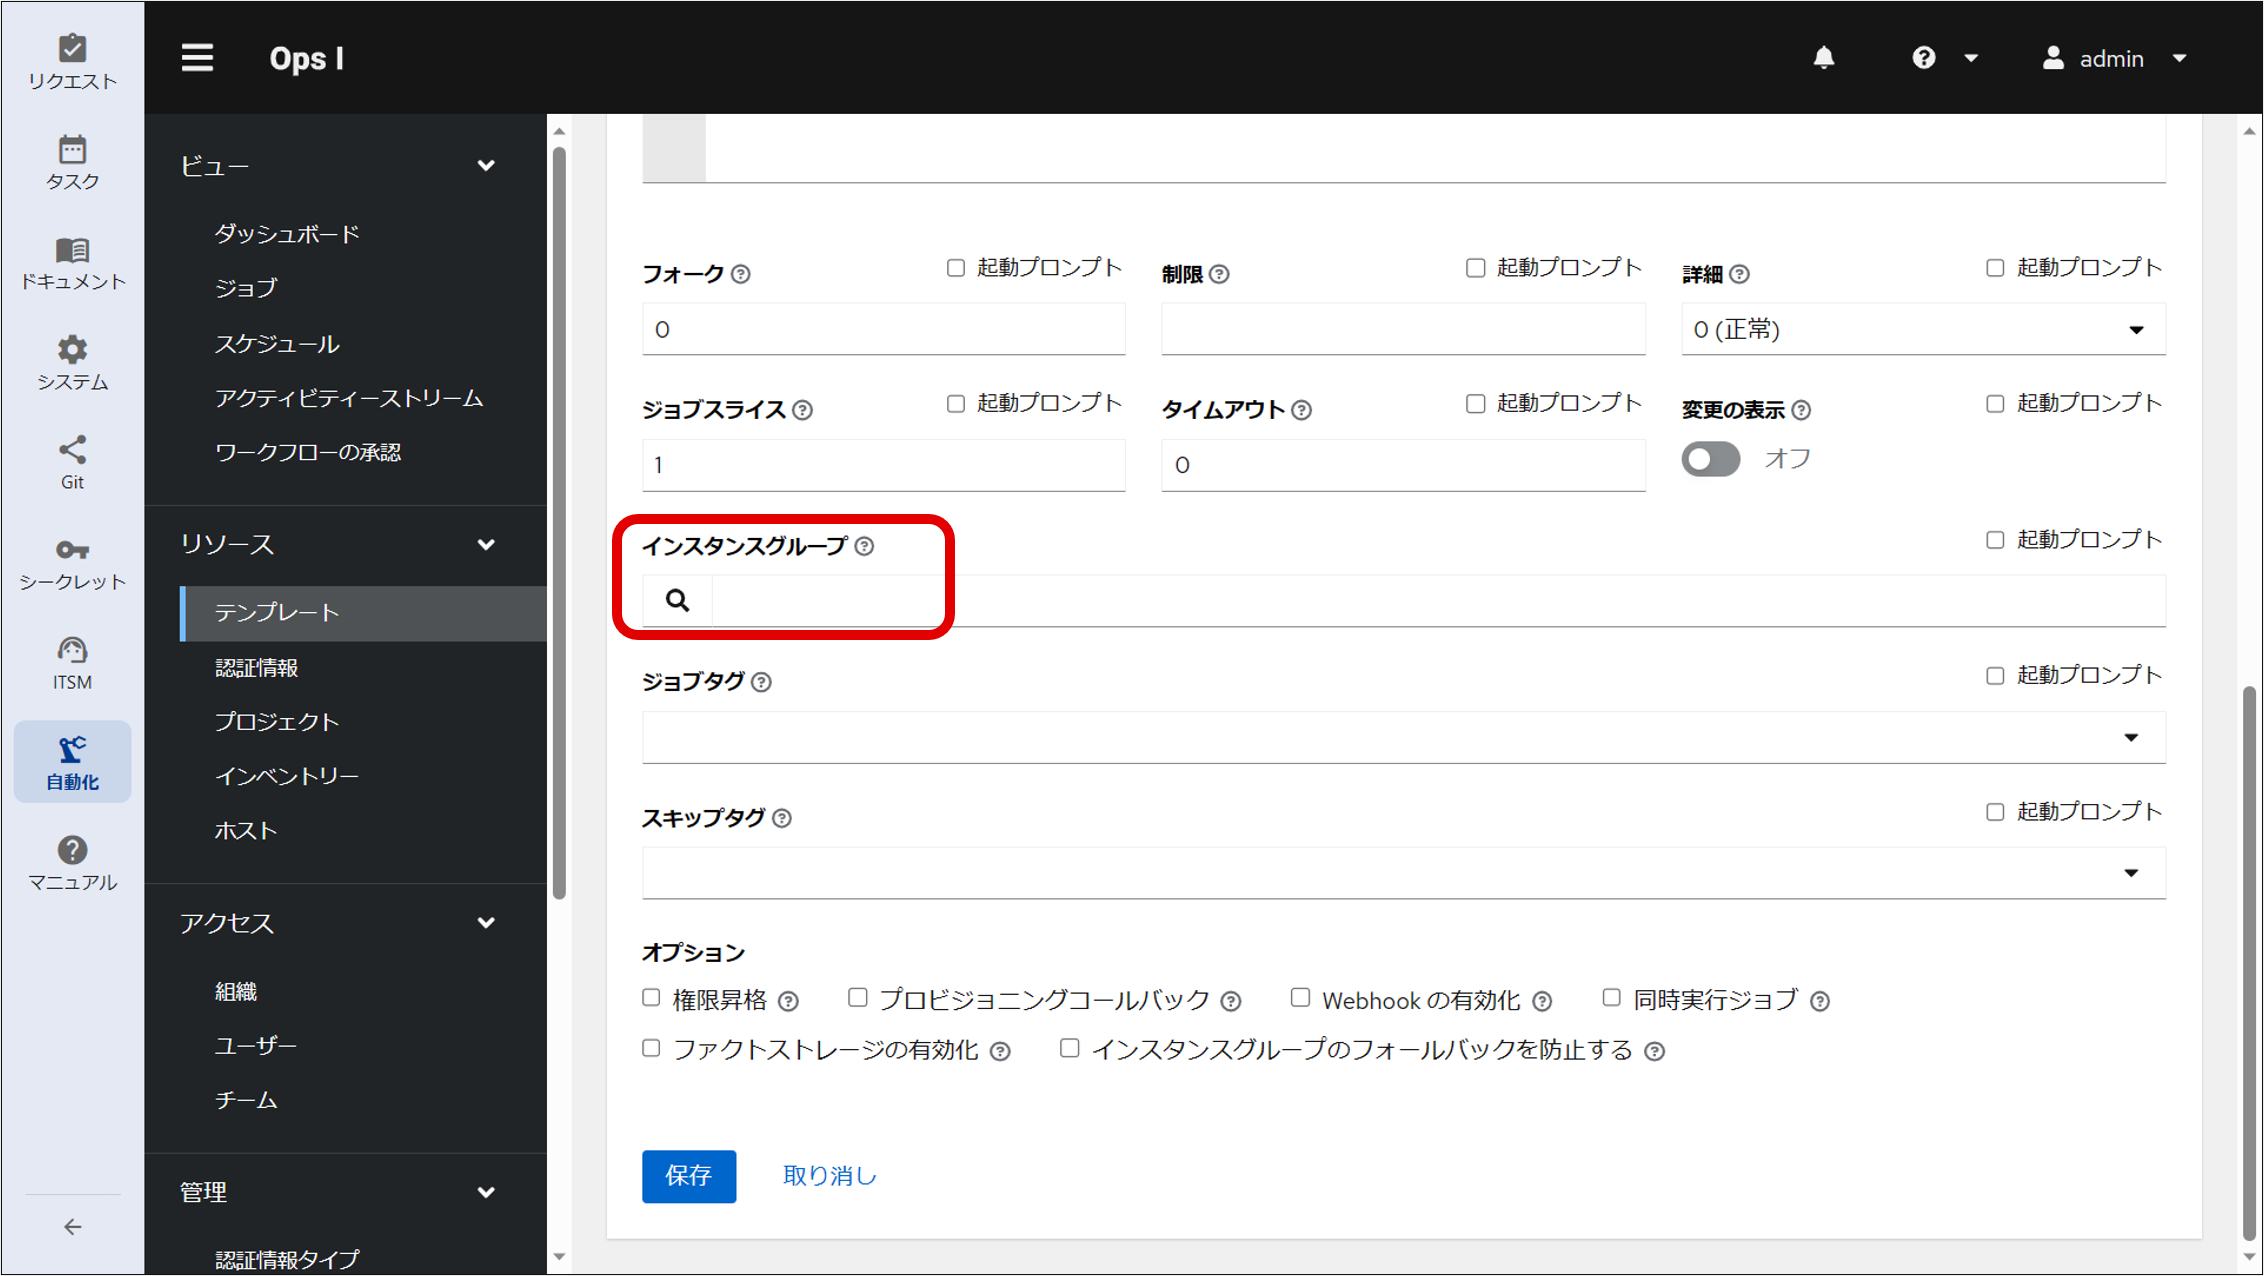
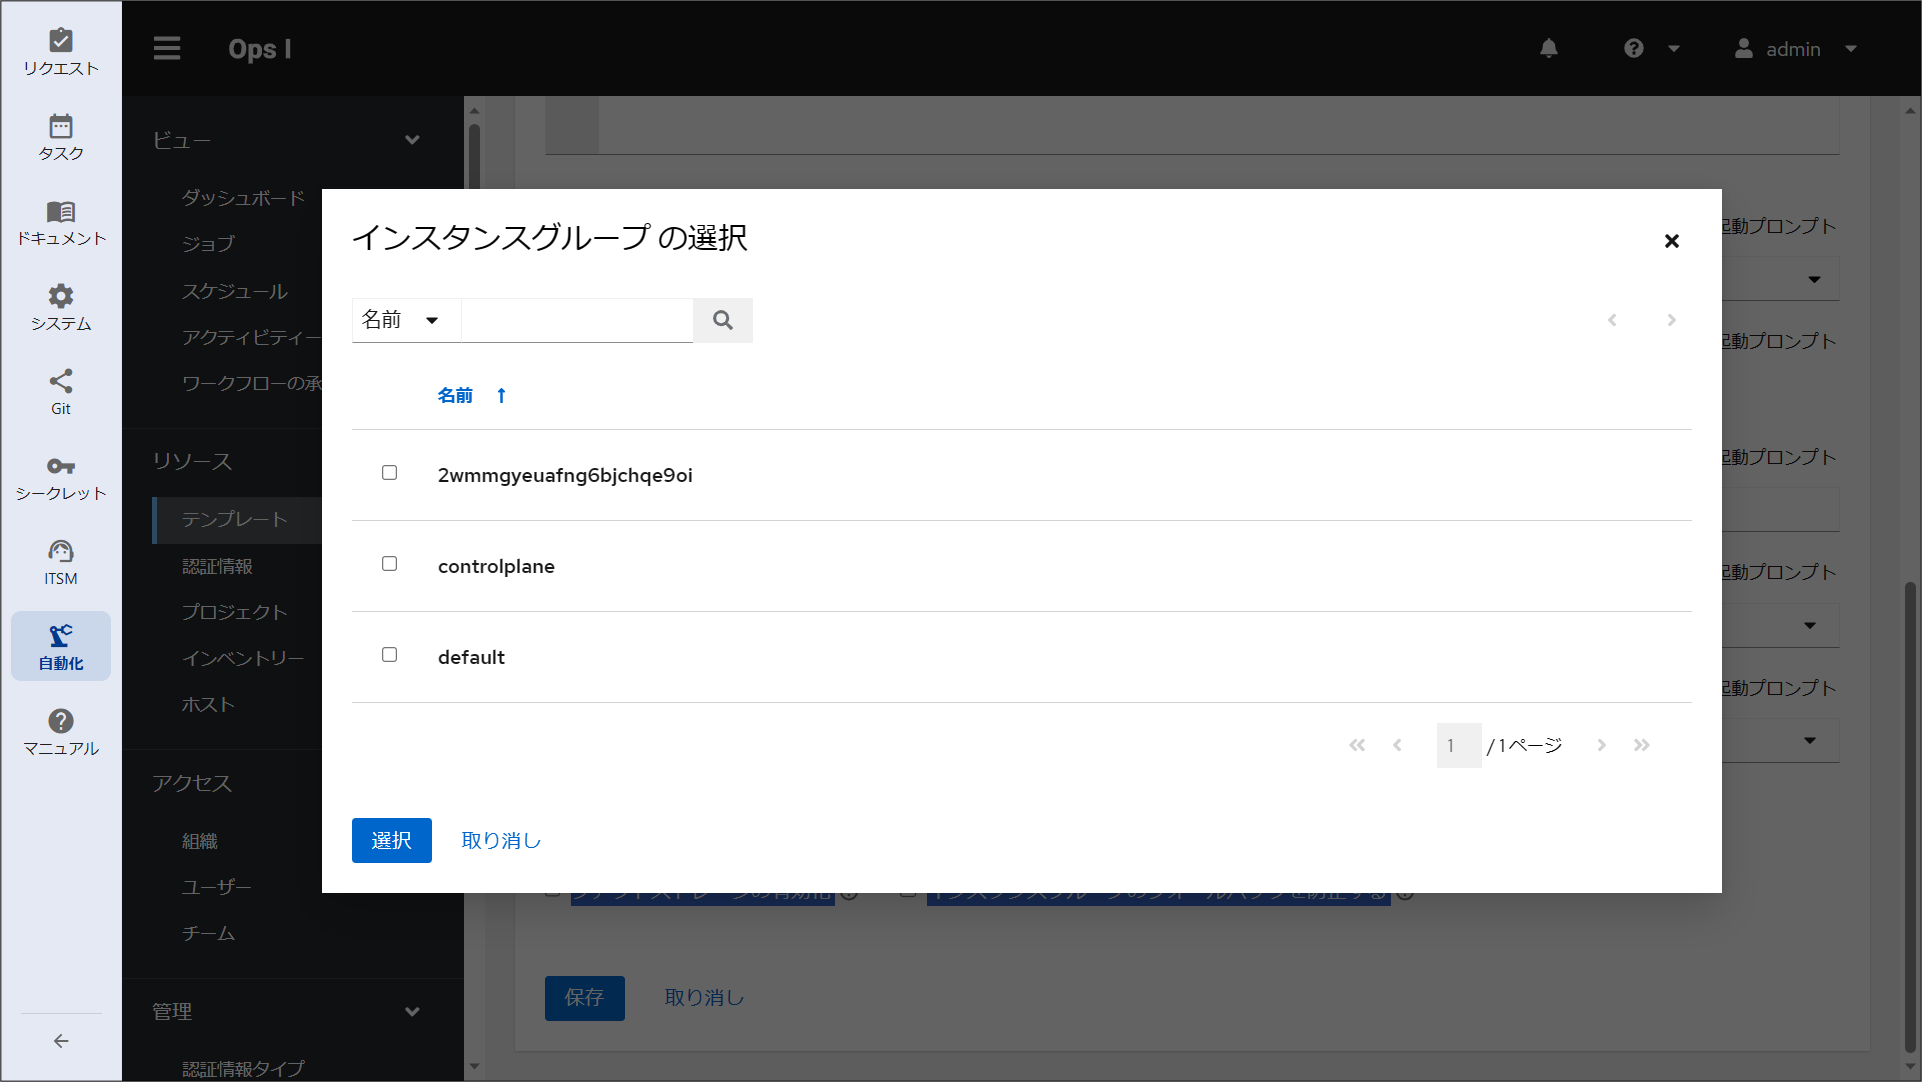
⑥ Specify “OpsI Outpost EE” as the execution environment for the job template.
[What to specify in the YAML file]
⑦ Specify the job template created at Step ④ in the workflow YAML file.
This allows the job template associated with the node group to be used from the workflow.
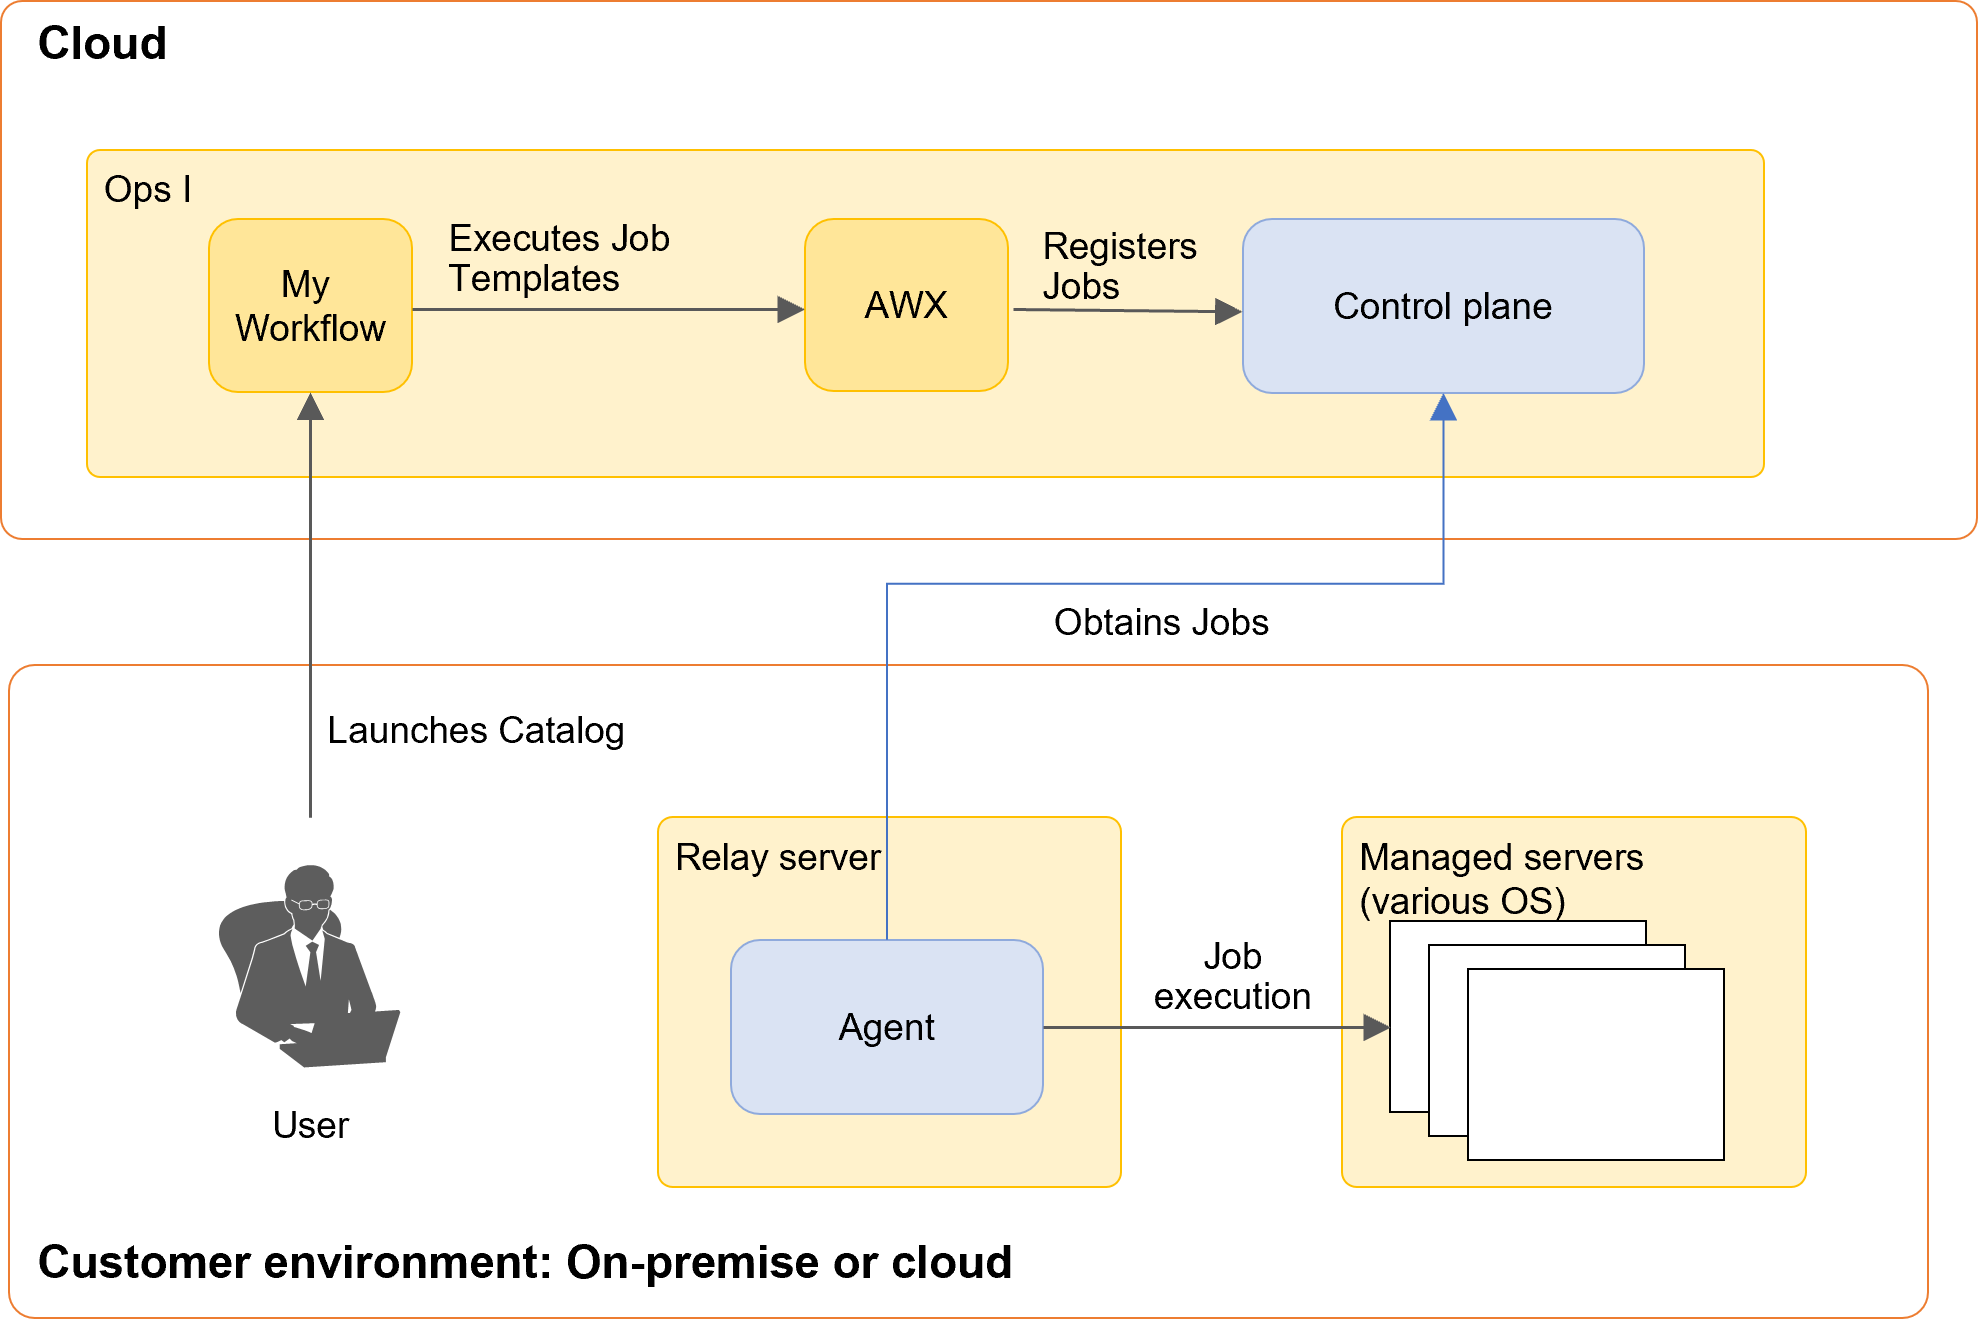
When a user launches a catalog item, the AWX job template is executed at the step where awx.run_job_template is set in the workflow, and the job is registered in the control plane. The agent of the relay server acquires the job and executes it against the managed server.
For information on the workflow YAML file, see "Workflow".
(Figure) Flow of job execution
[Restrictions on the number of jobs]
The number of jobs that can be run simultaneously on a single node is limited based on the hardware configuration; for example, the maximum number of jobs is 12 in the case of the minimum configuration described in “Prerequisites for installing RPM package”. If more jobs than the limit are run at the same time, the jobs exceeding the limit are placed in pending status, one of which is executed when one of the running jobs completes. However, a pending job that is not executed within the maximum waiting time of 5 minutes results in an error.
To run more jobs than the limit, you need to divide the node and ensure that the limit per node is not exceeded.
[Monitoring outpost operations]
It is recommended that you periodically check to see if the agent is running properly. It can be checked by seeing the status of the Ops I window or by running the status monitoring command. Process monitoring is also possible.
-
Checking by seeing the status of the Ops I window:
If the status is displayed as “Not Ready” on the node details window, the agent is stopped. For information on the node details window, see “Node management”. -
Checking by running the status monitoring command “opsiopctl.sh status”:
The agent runs the chisel and k3s systemd services, and the status of each service is output on the command line as a result of executing “opsiopctl.sh status”. If the service is stopped, “inactive” is displayed. If the status of either of the services is not “active”, “Outpost Agent is NotActive” is output and “1” is returned as the return value of the command.
The startup status can be checked by periodically running “opsiopctl.sh status” and viewing the return value of the command (0 or 1). For details on the commands, see [Monitoring outpost agent status: opsiopctl.sh status] in “Command scripts for RPM package”. -
Process monitoring: process monitoring can be performed for chisel and k3s. The paths to the executable files for the processes are as follows.
- chisel: /opt/opsi/outpost/bin/chisel
- k3s: /opt/opsi/outpost/bin/k3s