2.6.1 Notification using the Ops I notification function
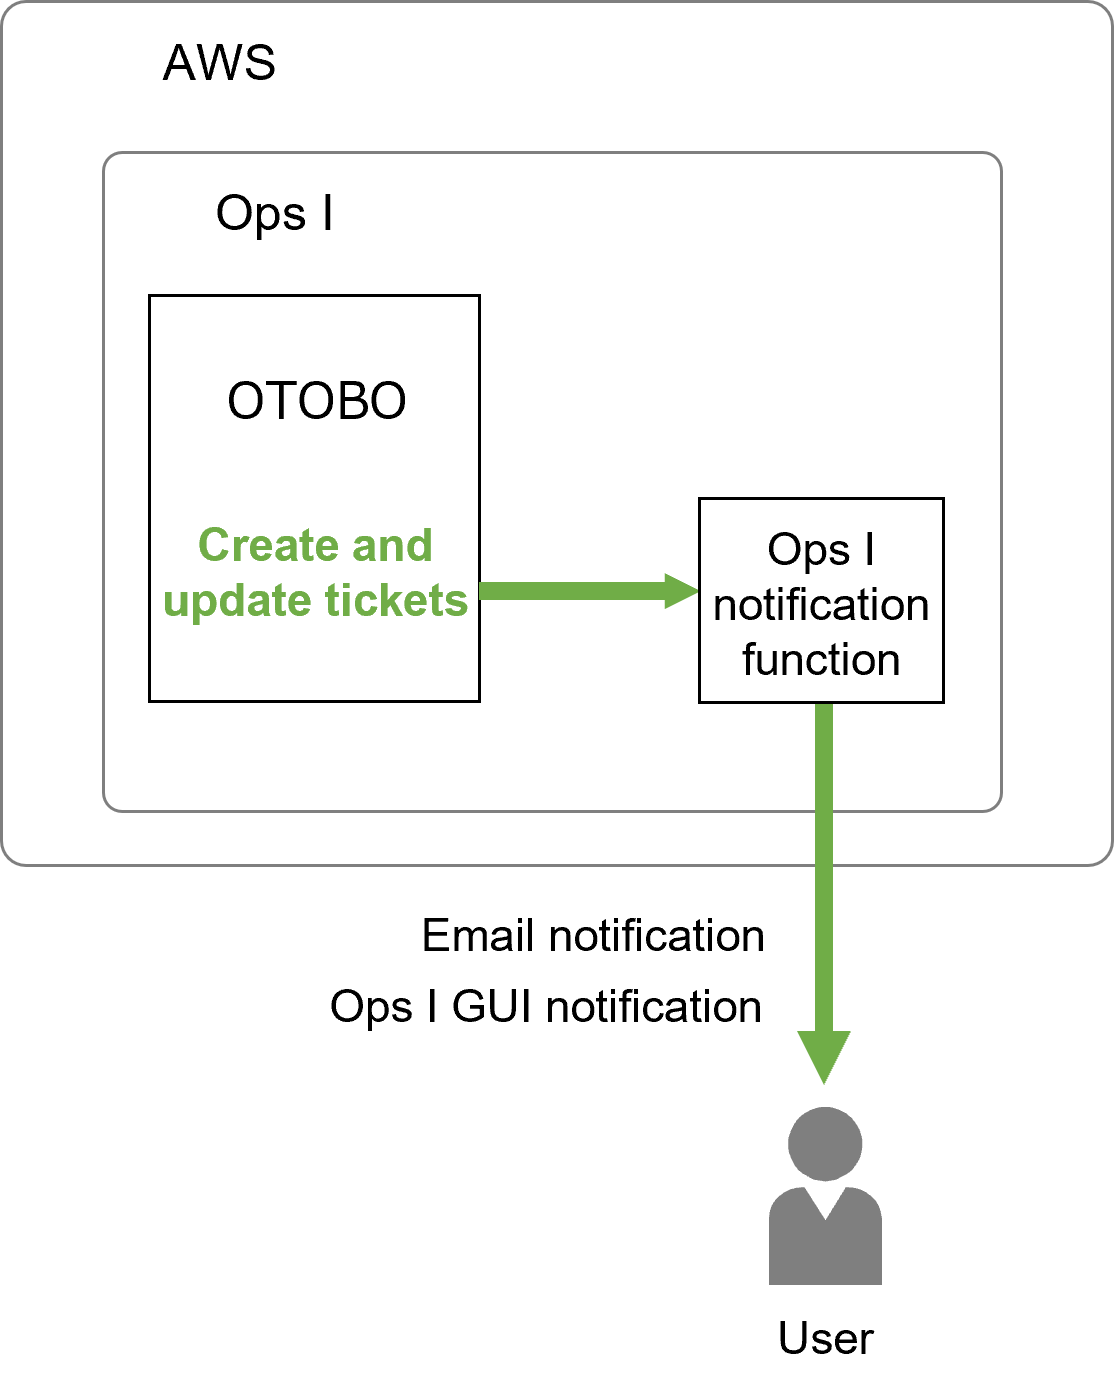
The Ops I notification function can be used to send notifications through the use of the Ops I GUI and emails.
(Figure) Configuration for notification using the Ops I notification function
The prerequisites and setting items are as follows.
[Prerequisites]
You do not need to prepare an email sending environment.
[Setting items]
Configure the settings for the following items. Setting is performed by a user with the role of System Administrator or Site Reliability Engineer. Only the “Notification settings” will be implemented by each agent.
(Table) Email notification setting items
| Setting items | Description | Required |
|---|---|---|
| Ops I notification function settings | This registers the settings required to send emails by using the Ops I notification function. | Required |
| Notification settings | This sets the items for which the agent wants to receive notifications and the queue to be monitored. | Optional |
The queue is the “Contact person” in Ops I ticket management. For details on creating and editing queues, see “Create and edit the contact person”.
(1) Ops I notification function settings
■ Configuring OTOBO
(Table) Registration widgets for the Ops I notification function
| Widget | Value |
|---|---|
| SendmailModule | Specify "OpsINotification". |
(2) Notification settings
■ Configuring OTOBO