3.1 Basic window structure
This sections describes the basic window structure for the “Ops I” window and how to call items on the window.
(Figure) Basic window structure
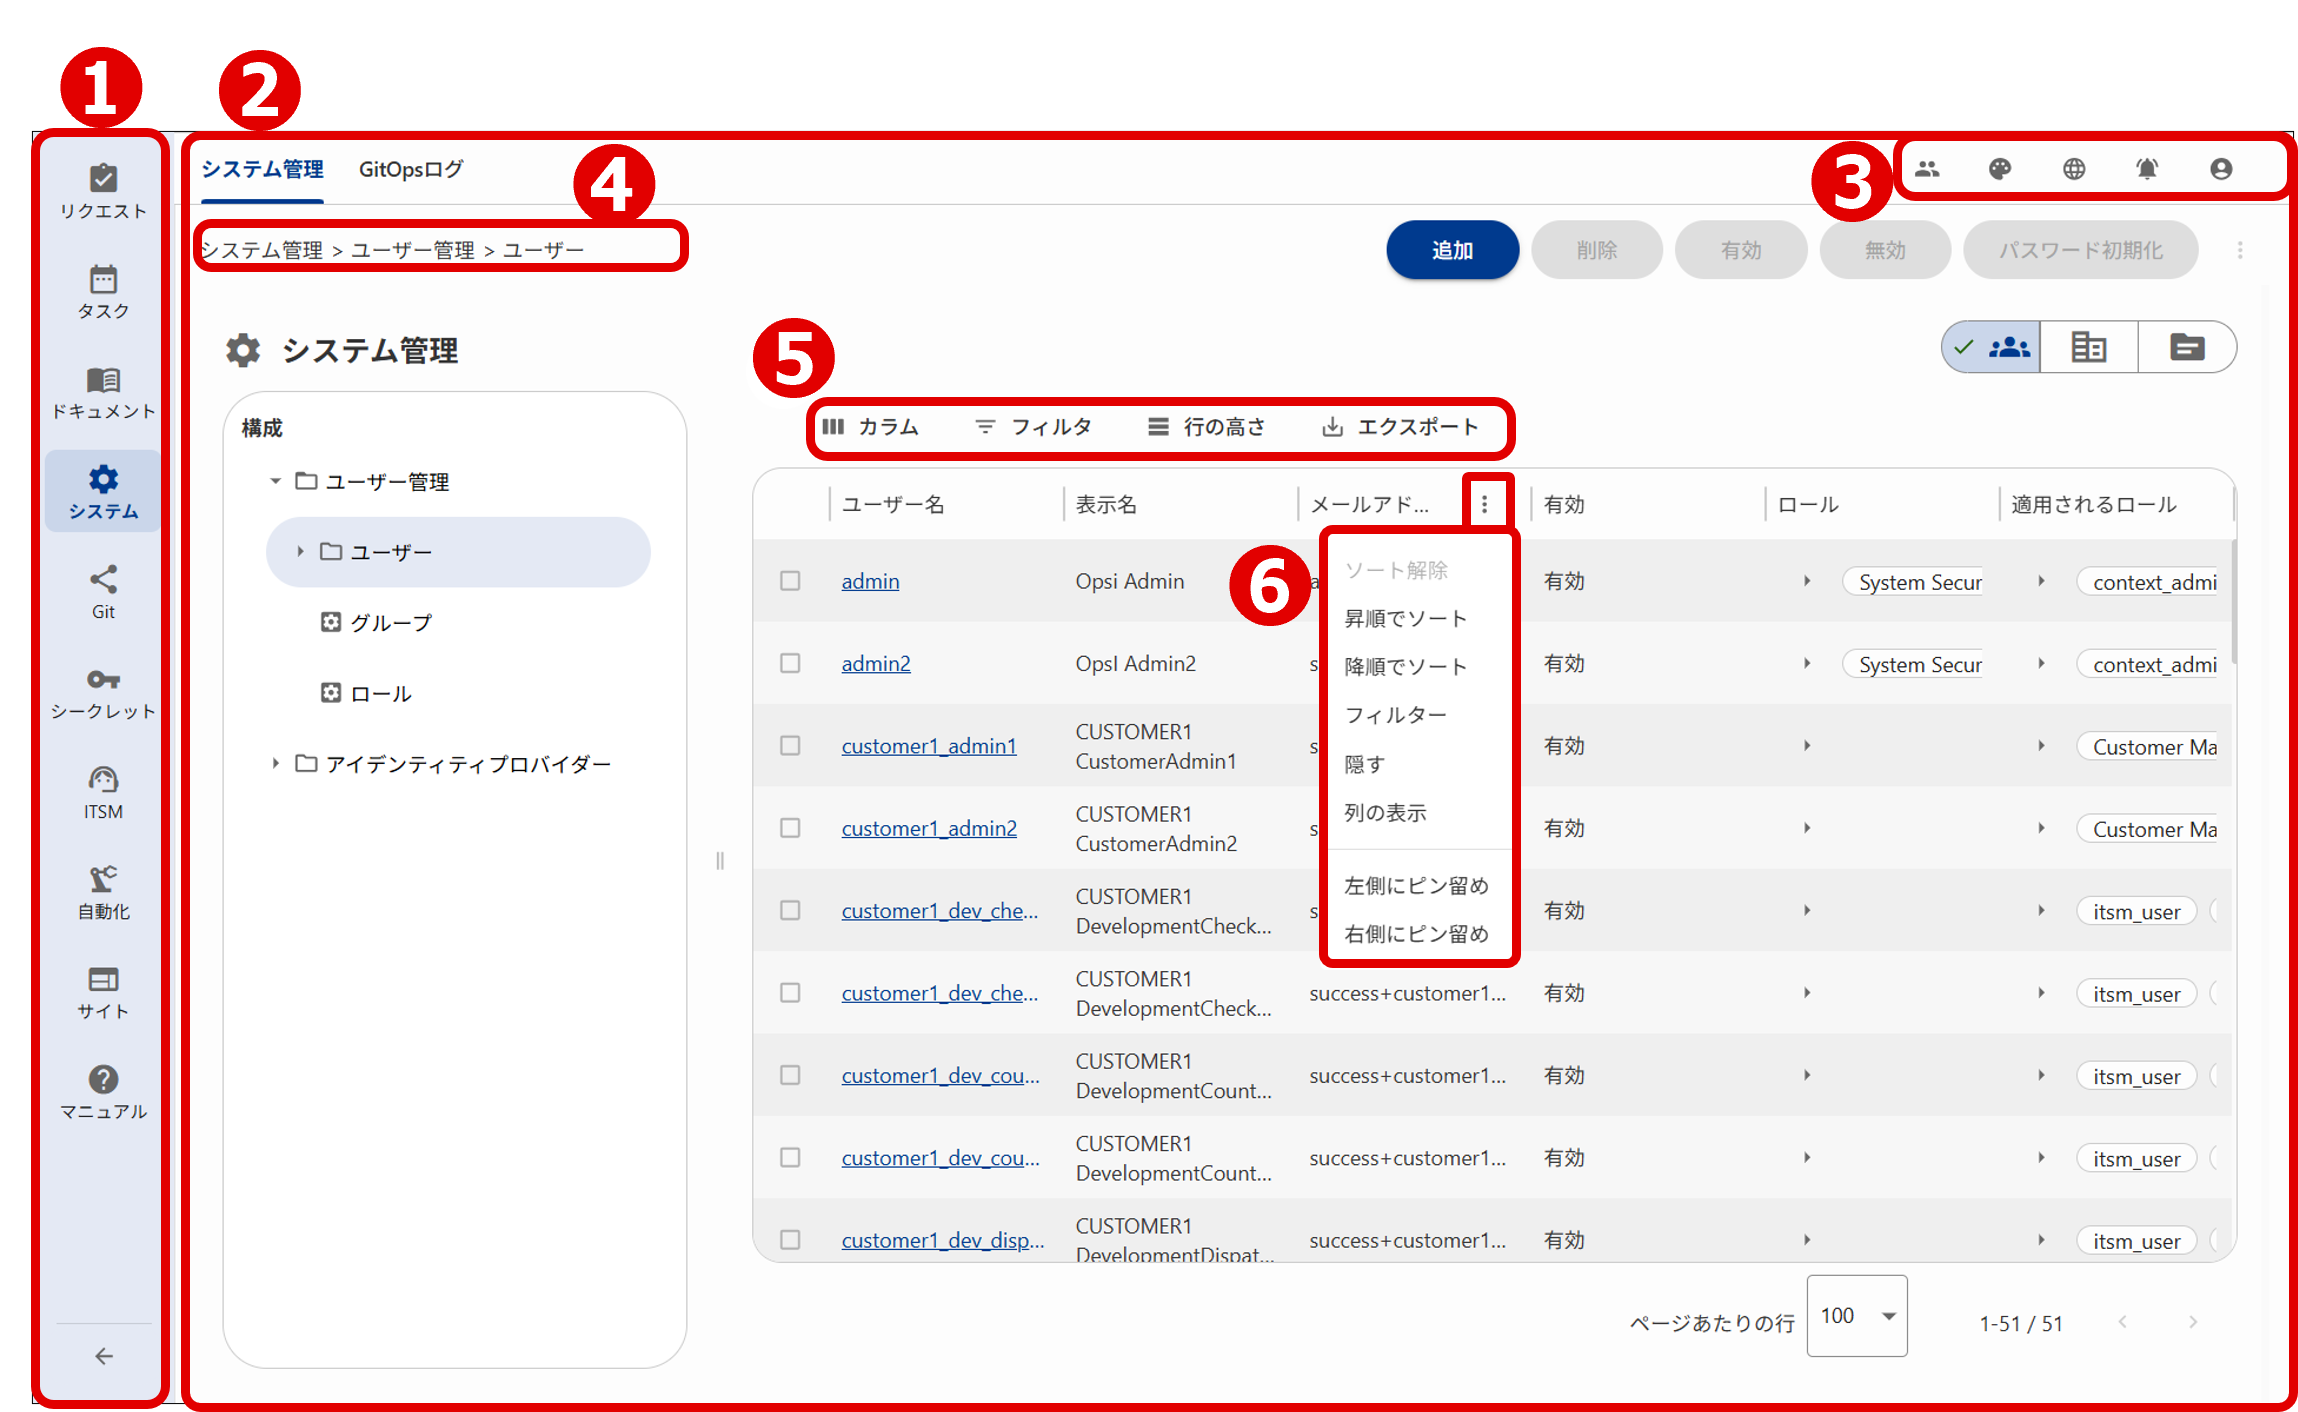
Select the various menu items to display the corresponding information in the contents area.
Displays information in accordance with the item selected in the menu area.
Several display icons are displayed in the window. Details are described.
-
AI extension function
You can use the AI extension function. For details, see “AI extension function”.

-
Notification
Use to check the contents of notifications addressed to you.

-
Personal
Use to check for logged-In users and to log out from Ops I. You can also change passwords from “Manage Account”.

-
Copy
Copy information such as the URL of the currently displayed window to the clipboard.
Although not shown in “(Figure) Basic window structure”, these icons are displayed in the respective locations.


Display the site page hierarchy as a list.
Displays when there is information displayed as part of a list, such as workflows and users. You can then filter the displayed information and export it as a CSV file.
- Columns
Select whether to display or hide the items in the information column in the displayed list.
Set the slide button for the items you want to display to "ON" to display them.
Note that even if you click "HIDE ALL", column 1 will still be displayed. For example, when displaying workflow lists, "Context ID" column will remain visible. - Filters
Apply a filter to the items in the information line of the list and select the items that you want to display.
Configure the filter by specifying filter values and conditions ("contains", "equals", etc.) - Density
Select from three line heights for the information line of the list. - Export
You can print the list of displayed information or download it in CSV format.
In principle, items in displayed columns are output, but rows in pages that are not displayed are also output.
However, in the following screens, only the information in displayed pages is output:- [Request]-[Workflow]-[Workflow list]
- [Request]-[Ticket]-[Ticket list]
- [Task]-[Workflow]-[Workflow list]
- [Task]-[Ticket]-[Ticket list]
- [Task]-[Ticket]-[Ticket zoom]-[lookup parent ticket]
- [Task]-[Schedule]-[Calendar list]
- [Task]-[Schedule]-[Schedule]-[Assigned Users Settings]
- [Task]-[Resource]-[Resource list]
- [Document]-[Container]-[Container list]
- [System]-[Organization Management]-[Organization list]
- [System]-[Outpost Management]-[Node]-[List]
- [System]-[Outpost Management]-[Node Group]-[List]
- [System]-[Outpost Management]-[IP Block]
If you perform printing, the checkboxes are simply printed as selected, and the number of items output is not affected.
 Notes
Notes
- You can break lines for some items. Because line height changes with line breaks, the printed result may not match the on-screen display.
- The icons displayed on the screen might be replaced with text and printed.
If there is listed information, this allows you to filter and sort the information in that list.
- If, after moving the cursor over the title bar of any of the items (in the column), an arrow is displayed, that item can be used when sorting information in the list.
- If
 is displayed on the title bar of any of the items (in the column), click it to display a menu for sorting and filtering the items.
Filtering and sorting may not be available for all items.
For example, you cannot sort items in the “Workflow” column, “Assigned To” column, “Assigned Group” column, “Customer” column or “Step” column in the workflow list. You also cannot filter items in the “Workflow” column or “Step” column in the workflow list.
Section structure
3.1.1 Account management
3.1.2 AI extension function